LeftyBassist.com

The online home for southpaw bassists.
It is currently November 1st, 2024, 2:35 pm


Post new topic Reply to topic  [ 20 posts ] 
Author Message
 Post subject: new 4-string lefty bass build
PostPosted: August 5th, 2011, 6:27 pm 
Offline
User avatar

Joined: March 10th, 2008, 7:00 pm
Posts: 1184
Location: Seattle, WA USA
I remembered to bring the camera out to the shop with me this afternoon, and captured a few images of the very early stages of building a bass body. there's no rocket science here, but it might be interesting if you haven't seen this kind of work before ...

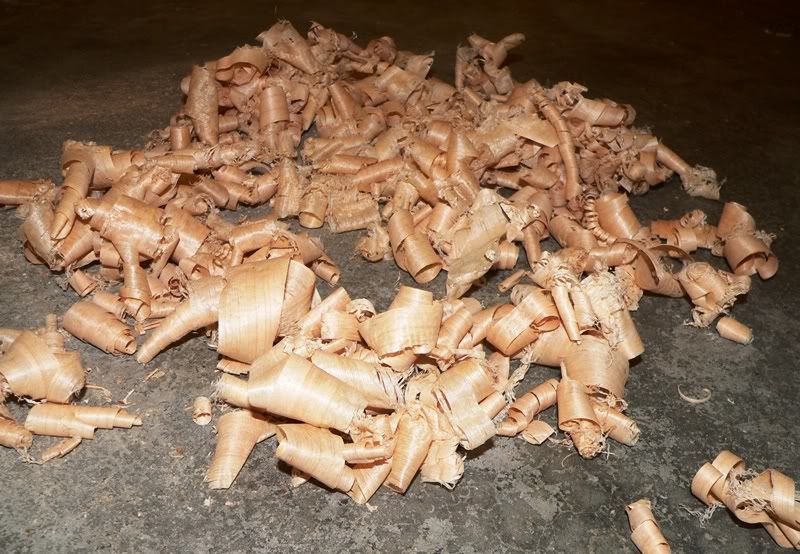
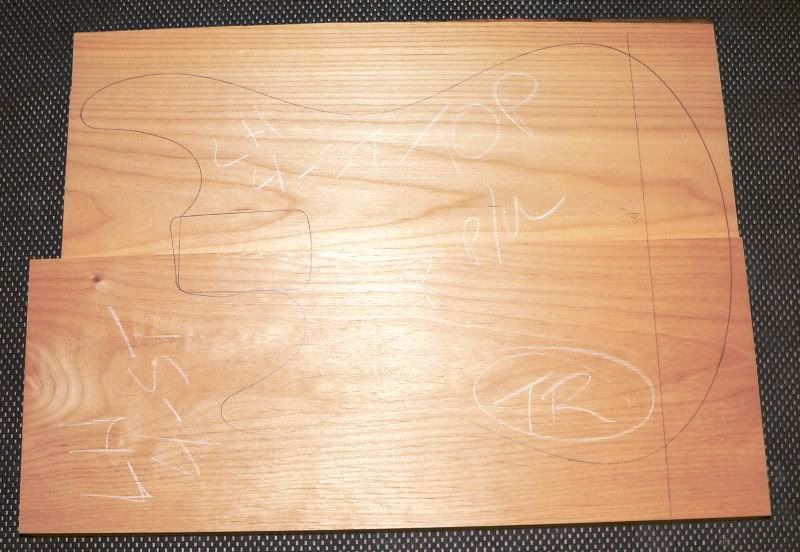
the first step was to use a hand plane to level one face on each of the body blank halves. here I'm working two pieces of Red Alder - a tree that grows like a weed in my back yard. planing these pieces creates a load of shavings

Image

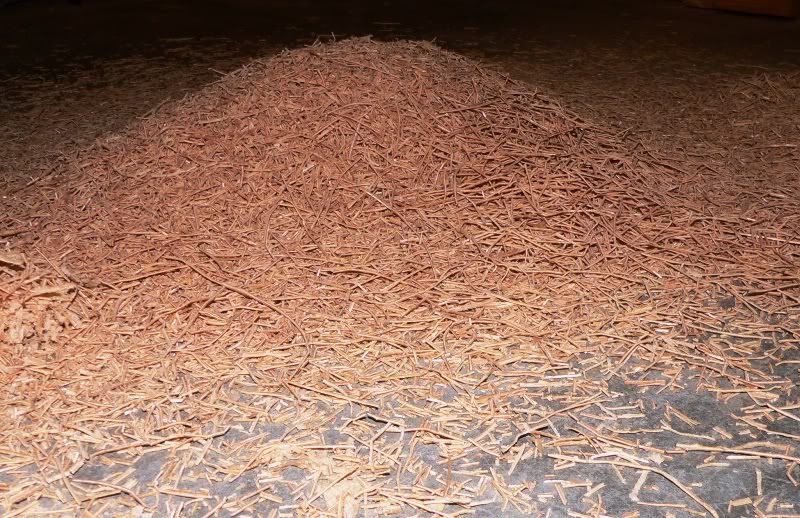
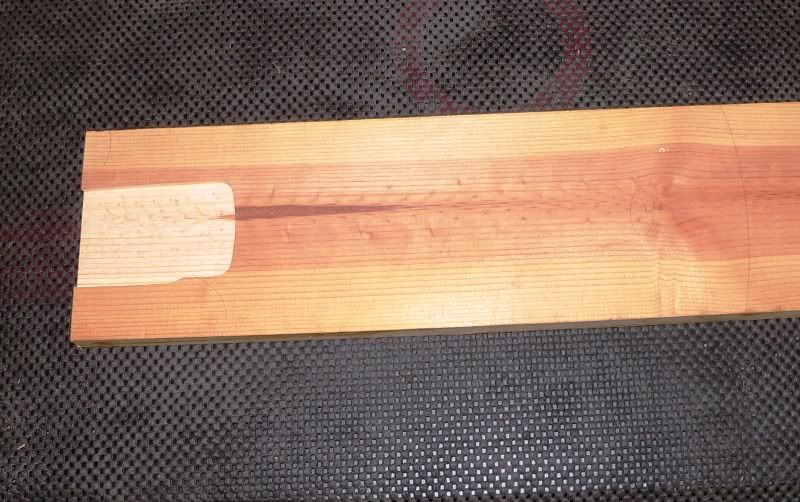
after each half had a planar face, I ran each piece thru a planer to get both faces parallel to each other and also to reduce the thickness to within a hair of where the final body will be. I do this on my Inca jointer/planer. this process also creates a lot of shavings, but of a different shape and texture

Image

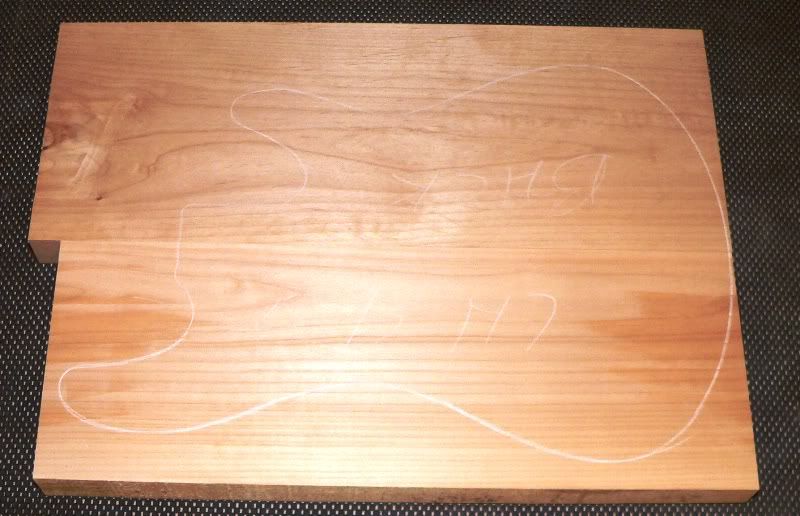
next step is to create a planar gluing edge one each piece that is also perpendicular to the parallel faces. I do this at the long bed jointer with the helical head. once both halves are prepped to this point, it's important to test fit the glue joint

Image

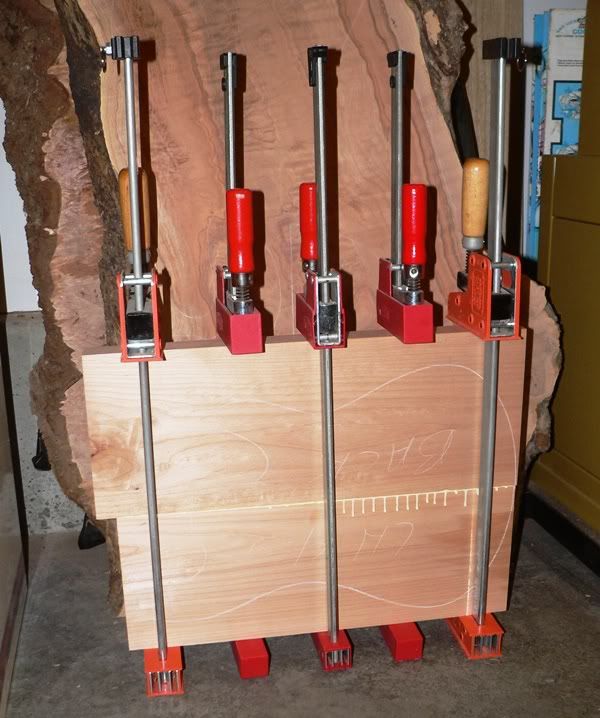
when the joint is perfect it's ready for glue and clamps

Image

I'll leave this in the clamps for 24 hours, and then let it sit for a few days so the moisture from the glue can dissapate out of the body blank

more later ....

all the best,

R

_________________
Moderator: Blueprinting and Bondo
Pickups: Honey Badger Pickups - Like Honey Badger Pickups on Facebook!
Basses: Regenerate Guitar Works - Like Regenerate Guitar Works on Facebook!


Top
 Profile  
Reply with quote  
 Post subject: Re: new 4-string lefty bass build
PostPosted: August 6th, 2011, 7:04 pm 
Offline
User avatar

Joined: March 10th, 2008, 7:00 pm
Posts: 1184
Location: Seattle, WA USA
the glue was set, so the body is out of the clamps a few hours ahead of schedule. some would consider a 24 clamp for Titebond Original overkill for a seam this small

was tidying up my new clear acrylic neck pocket routing template for this build when I discovered a pool of liquid right after I smeared it all over the template ... red liquid ... not good :( seems I missed rounding one of the edges I routed for the neck pocket, and it was sharp enough that I sliced my finger without even feeling it. nothing a little square cut from a rag and some duct tape can't fix :D (hence my break to type this vs. continuing on in the shop)

before taking a break I did get the neck pocket template completed. I'll test it on some scrap before using it on the actual body. if all is a go I may cut the neck pocket this afternoon (yes I'm antsy to get this body completed and ready for paint)


speaking of paint ... my Reranch order arrived yesterday afternoon. I'm leaning towards Vintage White on this one, but Daphne Blue is a close runner up. either way it's going to be Nitro for this body, and either color will look great with the Maple/Rosewood neck this bass will have installed once it's buffed out

progress images later today when I have time to edit them ...

all the best,

R

_________________
Moderator: Blueprinting and Bondo
Pickups: Honey Badger Pickups - Like Honey Badger Pickups on Facebook!
Basses: Regenerate Guitar Works - Like Regenerate Guitar Works on Facebook!


Top
 Profile  
Reply with quote  
 Post subject: Re: new 4-string lefty bass build
PostPosted: August 6th, 2011, 7:06 pm 
Offline
User avatar

Joined: March 10th, 2008, 7:00 pm
Posts: 1184
Location: Seattle, WA USA
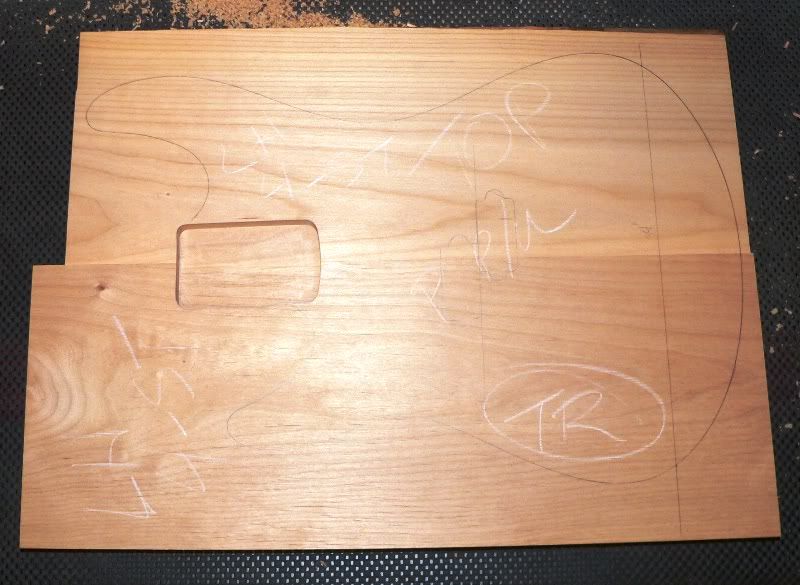
here's the body blank prepped for the neck pocket to be routed. I use two templates to do this - one for the body outline itself, and a second template for only the neck pocket. the neck pocket template is designed to cut the pocket longer and, once past where the upper and lower cutaways intersect to the pocket, wider than the pocket itself. it's tought to see this size difference in this small of an image

Image

as soon as I test the new neck pocket template and know it's good, I'll get to work adding the neck pocket to this body blank before I cut it out

all the best,

R

_________________
Moderator: Blueprinting and Bondo
Pickups: Honey Badger Pickups - Like Honey Badger Pickups on Facebook!
Basses: Regenerate Guitar Works - Like Regenerate Guitar Works on Facebook!


Top
 Profile  
Reply with quote  
 Post subject: Re: new 4-string lefty bass build
PostPosted: August 6th, 2011, 7:07 pm 
Offline
User avatar

Joined: March 10th, 2008, 7:00 pm
Posts: 1184
Location: Seattle, WA USA
not much time to write details, as I gotta run to sound check in a few ...


the neck pocket template test was a perfect success

Image


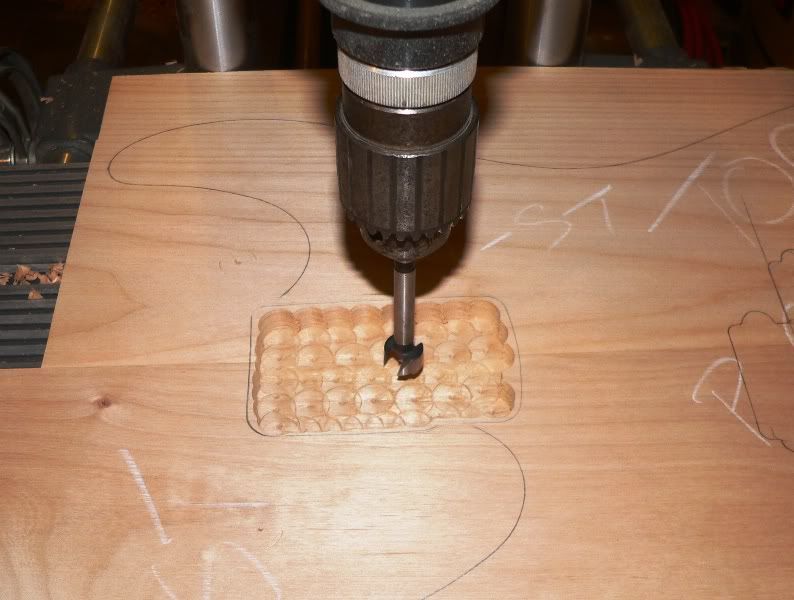
so I then was ready to cut the pocket in the real body. first step is to rough the pocket out at the pillar drill using a Forstner bit

Image

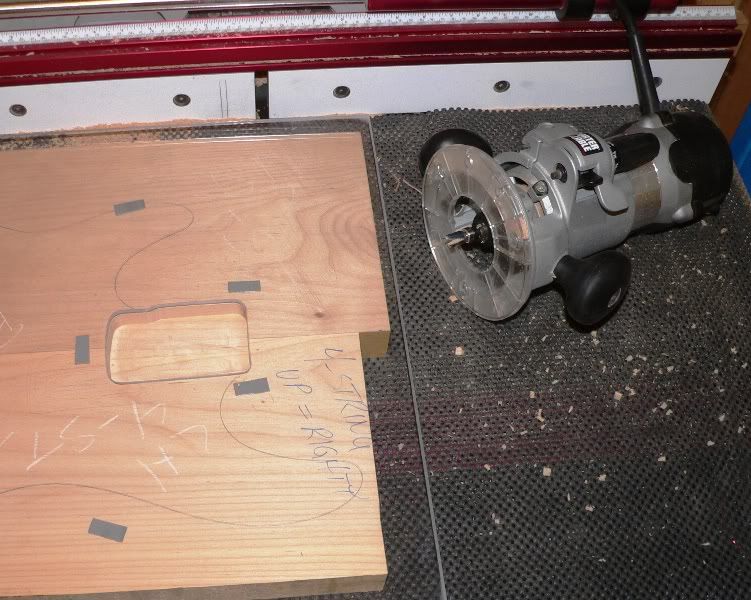
then stick the template onto the body blank in perfect alignment, and use a template bit to cut the pocket to proper depth utilizing multiple passes to remove the remaining wood from the bottom and edges

Image

and presto! a new neck pocket appears in the body blank.

Image

next step is to rough out the body outline, and will be the topic covered in my next progress post

all the best,

R

_________________
Moderator: Blueprinting and Bondo
Pickups: Honey Badger Pickups - Like Honey Badger Pickups on Facebook!
Basses: Regenerate Guitar Works - Like Regenerate Guitar Works on Facebook!


Top
 Profile  
Reply with quote  
 Post subject: Re: new 4-string lefty bass build
PostPosted: August 7th, 2011, 2:56 pm 
Offline
User avatar

Joined: March 10th, 2008, 7:00 pm
Posts: 1184
Location: Seattle, WA USA
sorry for the lack of blood images - it's one of a couple restrictions imposed by my CFO ;)

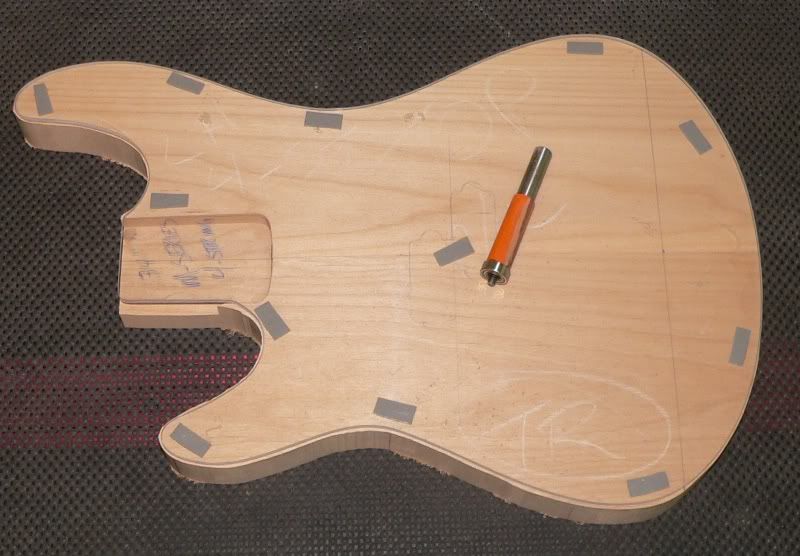
the next step is to rough out the outline of the body at the bandsaw. once that's done I'll reattach the clear plexi body outline template in prep for the following step

Image

once the template is attached, I'll secure the template to several blocks of like height (not shown), flip it over, and then utilize another template bit to trim the body outline to the plexi definition. I use a special bit for this, and though it's difficult to see in this image it actually has a slight twist to the cutting edge. this leaves a super smooth edge and minimizes the potential for chip out when cutting against the grain. I also use a series of standard and climb cuts to further reduce the risk for chip out. end result is a body outline that needs very little finessing to eliminate any ripples in the outer contour

after this I remove the template and round the front and back outside edges with a round over bit before moving onto carving the gut-cut and forearm contours. more on carving these features in my next post

all the best,

R

_________________
Moderator: Blueprinting and Bondo
Pickups: Honey Badger Pickups - Like Honey Badger Pickups on Facebook!
Basses: Regenerate Guitar Works - Like Regenerate Guitar Works on Facebook!


Top
 Profile  
Reply with quote  
 Post subject: Re: new 4-string lefty bass build
PostPosted: August 8th, 2011, 5:34 pm 
Offline
User avatar

Joined: March 10th, 2008, 7:00 pm
Posts: 1184
Location: Seattle, WA USA
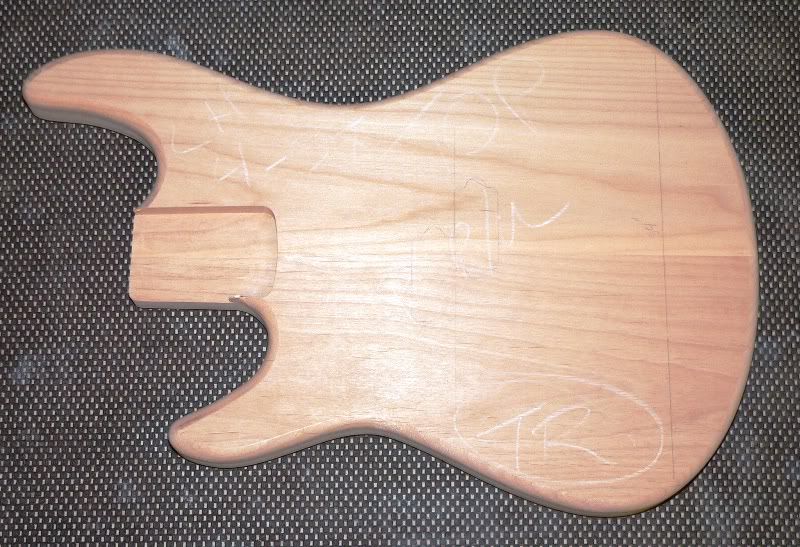
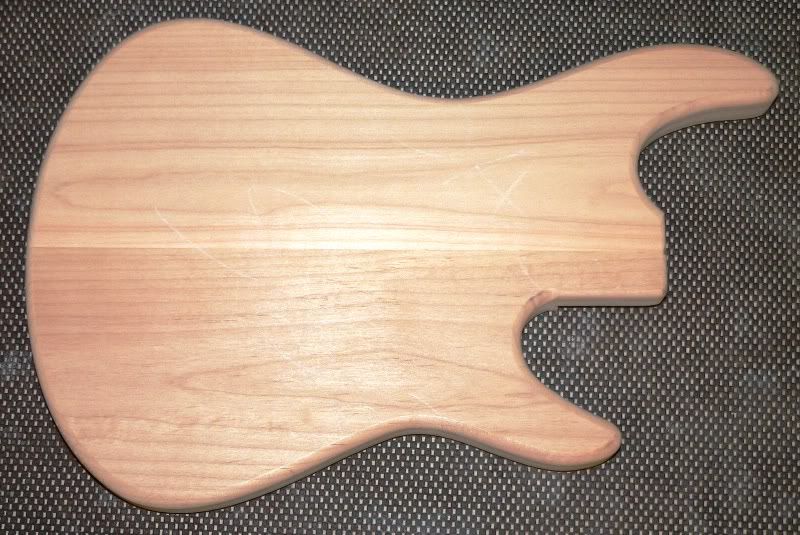
well I didn't make it to carving yet, but I did get the perimeter detailed and edges rounded over

Image
Image

for those who haven't seen it before, I think you'll be ... ummm ... 'real interested' to see my tool of choice for roughing the gut-cut prior to breaking out the rasps. just a little teaser until next time :cool:

all the best,

R

_________________
Moderator: Blueprinting and Bondo
Pickups: Honey Badger Pickups - Like Honey Badger Pickups on Facebook!
Basses: Regenerate Guitar Works - Like Regenerate Guitar Works on Facebook!


Top
 Profile  
Reply with quote  
 Post subject: Re: new 4-string lefty bass build
PostPosted: August 9th, 2011, 5:56 pm 
Offline
User avatar

Joined: March 10th, 2008, 7:00 pm
Posts: 1184
Location: Seattle, WA USA
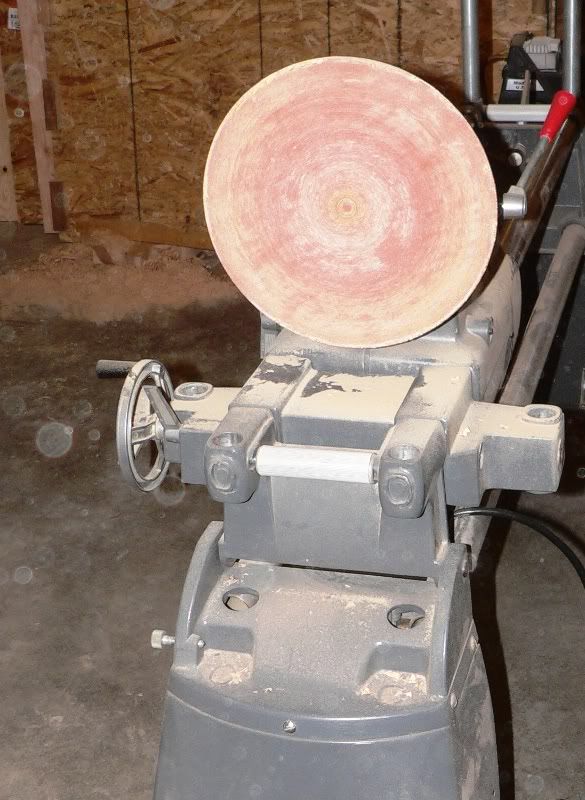
today I started off by sanding the forearm contour into existence. I first swap out the drill bit holder for a sanding disk on my ShopSmith, locate the power head to the end of the unit,

Image

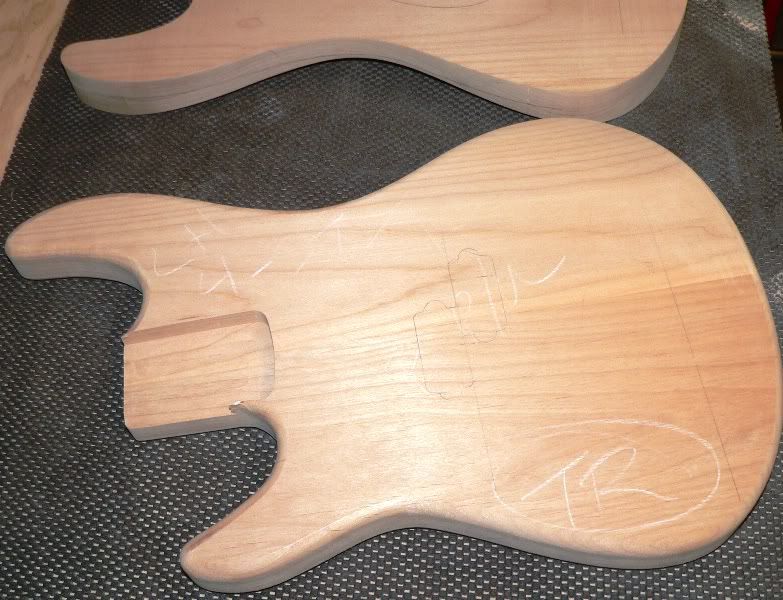
and then carefully sand away for a couple of minutes until I have a nice and comfy contour. here you can see the contour by comparing the lower body to an unsanded body edge I butted this body against. this was somewhat difficult to get a camera image of, and this was the best I could do without fancy studio lighting

Image

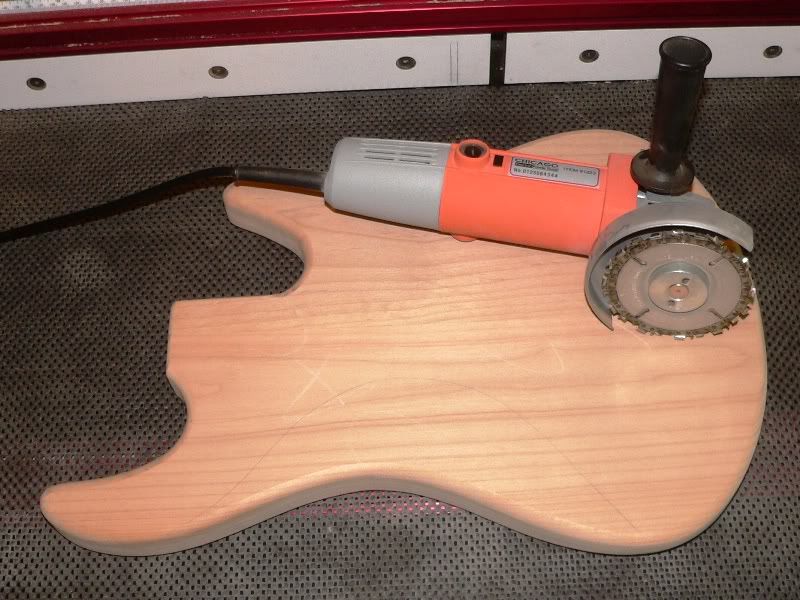
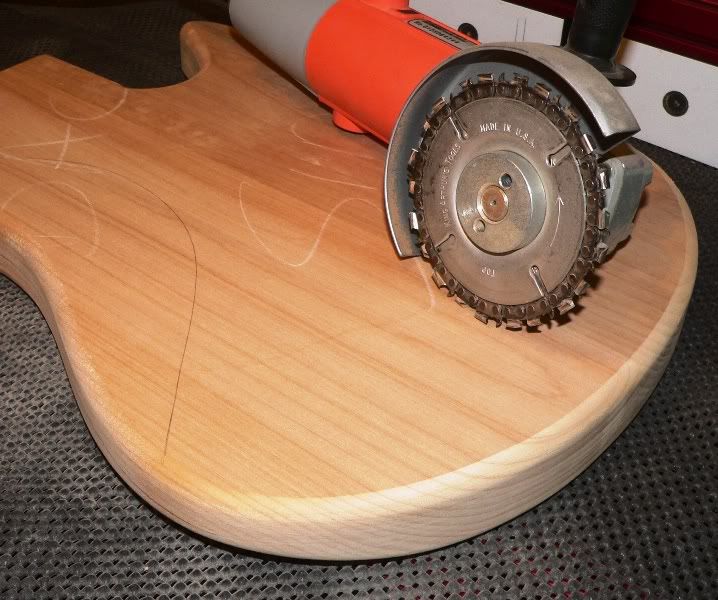
once the forearm contour is complete, I swap sides and go to work on the gut-cut. my tool of choice for this is a cheap electric angle grinder with a Lancelot chain saw blade. it is essentially a mini chainsaw that will tear the entire world into shreds if you're not extremely careful. these are used by most of the guys who do major log carving

Image

and just in case it doesn't look dangerous enough, here's a more menacing angle

Image

the Lancelot makes quick work of roughing out the gut-cut on this Alder body. total working time to carve this was somewhere between 3 and 5 minutes

Image

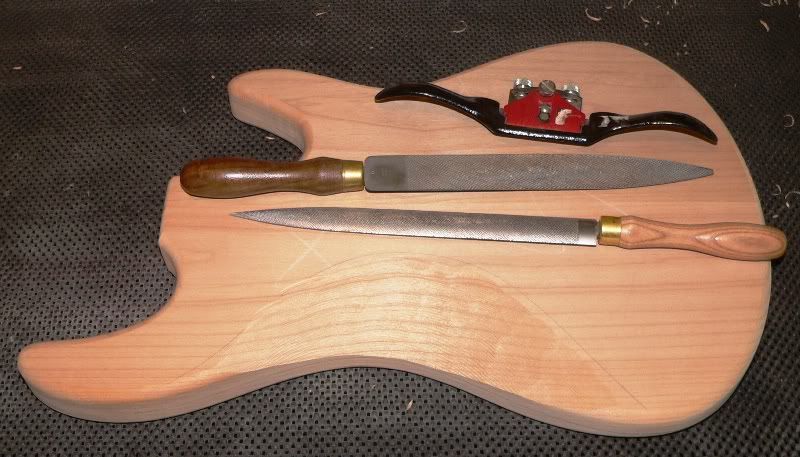
from here I use three different rasps to detail the gut-cut further until I'm completely satisfied with the smoothness of the surface. you can really save yourself a lot of time utilizing good quality rasps. for reference, I used to use a spokeshave to rough carve a gut-cut ... and the use of the Lancelot and rasps have eliminated over an hour from this process. I believe my 'turn the Lancelot on' to 'done detailing with the rasps' time was only about 15 minutes for adding this body feature. here it is ready for some initial sanding

Image

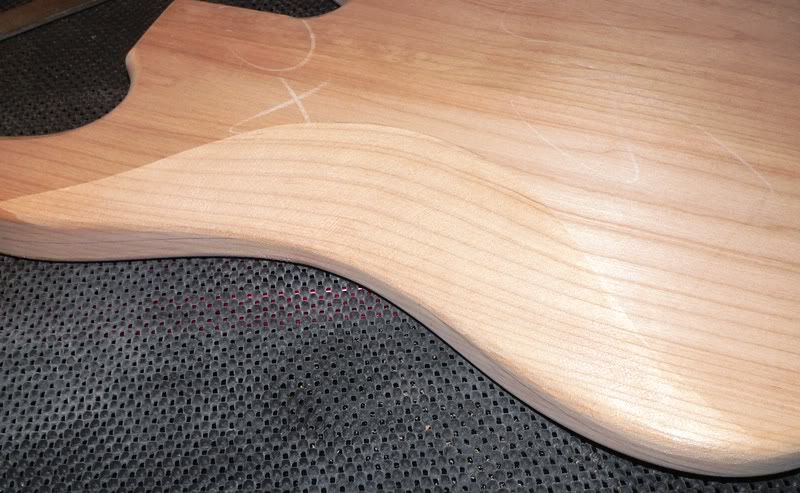
and again after being worked with 80 and 100 grit paper

Image


I need to make a couple routing templates before the next steps - adding the pickup and top routed control cavities - so it'll be a day or two before I get back to posting further updates. adding to the delay will also be a lengthy studio session on Wednesday where I'm laying bass tracks for the band's upcoming EP.

all the best,

R

_________________
Moderator: Blueprinting and Bondo
Pickups: Honey Badger Pickups - Like Honey Badger Pickups on Facebook!
Basses: Regenerate Guitar Works - Like Regenerate Guitar Works on Facebook!


Top
 Profile  
Reply with quote  
 Post subject: Re: new 4-string lefty bass build
PostPosted: August 10th, 2011, 4:57 am 
Offline
User avatar

Joined: November 26th, 2008, 6:14 am
Posts: 3624
Location: Oahu, Hawaii
Thanks for the pictorial and explanations.... I'm going to have to add the Lancelot attachment to my carpenters tool arsenal!

_________________
R&B Stretch Bass, Walter Woods 1000w Green-Light Stereo Amp, AccuGroove El Whappo and TR112, assorted axes, amps, cabs...
http://www.myspace.com/thestrangershawaii


Top
 Profile  
Reply with quote  
 Post subject: Re: new 4-string lefty bass build
PostPosted: August 10th, 2011, 8:04 am 
Offline
User avatar

Joined: March 14th, 2008, 10:57 am
Posts: 2866
Rod, thanks for those pics.

I too need to add one of those Lancelot's to my tool chest. I have been looking for a small power tool that I can use to trim bark off of my mini-palm trees. It's a major PITA to have to use a hacksaw and do it by hand.


Top
 Profile  
Reply with quote  
 Post subject: Re: new 4-string lefty bass build
PostPosted: August 10th, 2011, 5:43 pm 
Offline
User avatar

Joined: November 26th, 2008, 6:14 am
Posts: 3624
Location: Oahu, Hawaii
AzWhoFan wrote:
Rod, thanks for those pics.

I too need to add one of those Lancelot's to my tool chest. I have been looking for a small power tool that I can use to trim bark off of my mini-palm trees. It's a major PITA to have to use a hacksaw and do it by hand.


Living here in Hawaii I've had my share of trimming palm trees of various sizes, and so far the best tool by far has been a sawzall with a long wood blade on it. I also have a blade that has teeth on it like a woodcutters crosscut saw, which will rip through anything wood or fiber based.

_________________
R&B Stretch Bass, Walter Woods 1000w Green-Light Stereo Amp, AccuGroove El Whappo and TR112, assorted axes, amps, cabs...
http://www.myspace.com/thestrangershawaii


Top
 Profile  
Reply with quote  
 Post subject: Re: new 4-string lefty bass build
PostPosted: August 13th, 2011, 12:40 pm 
Offline
User avatar

Joined: March 10th, 2008, 7:00 pm
Posts: 1184
Location: Seattle, WA USA
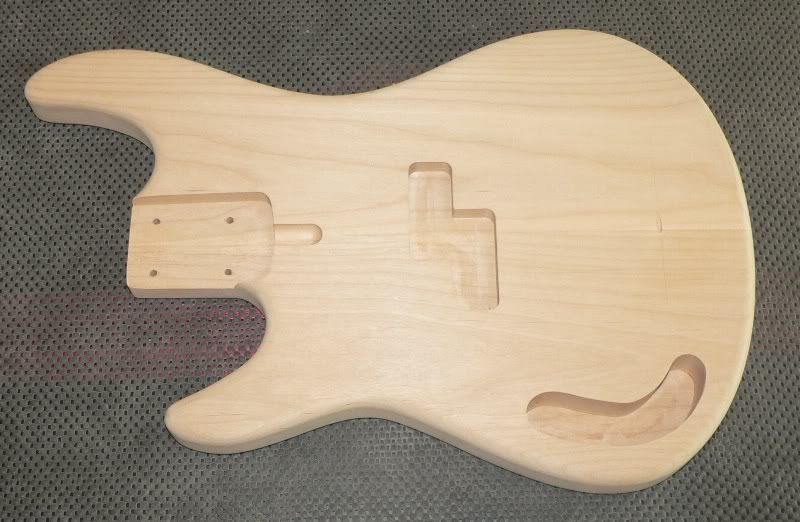
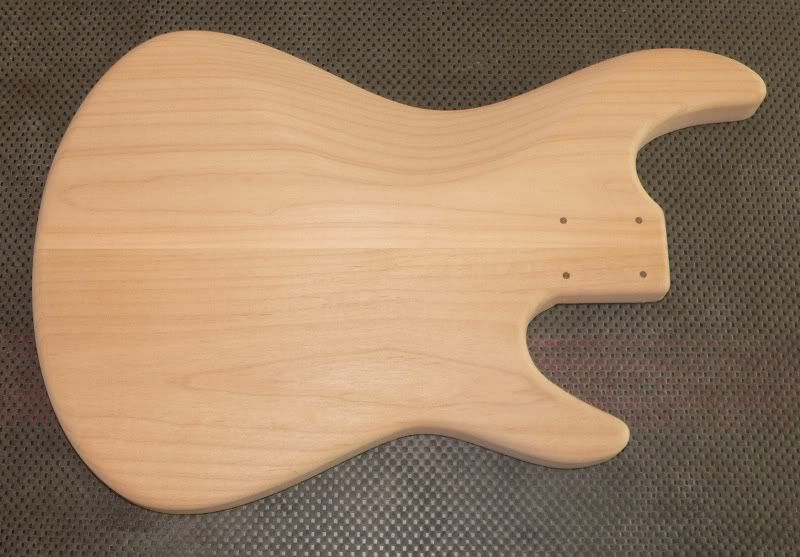
had some great shop time this morning, and pretty much have this body completed and ready for sanding in prep for paint ...

- completed the pickup routin template, and following the Forstner bit wood removal technique used on the neck pocket I removed the bulk of the wood from the pickup cavity. I then followed-up by locating the template and cleanin up the pocket with a pattern bit in the router

- layed-out the top routed control cavity, cleaned out the bulk of the wood with a Forstner bit, detailed the perimeter edge with two different rasps, and used a combination of router bits to detail the cavity edges and bottom face

- drilled the wiring tunnel from the pickup cavity to the control cavity, and also added a tunnel to connect the bridge grounding wire to the control cavity

- drilled the neck mounting holes

- used a bullnose bit with a bearing on the shank to route a trussrod adjustment slot at the base of the neck pocket. all of my necks are built with a heel adjust trussrod, and this slot allows you to easily adjust the trussrod without having to loosen/remove the neck. depending on customer preference, pickguards are made with or withour a corresponding slot ... those without a slot need to be removed to gain access to the trussrod adjustment nut, but this option definitely has a cleaner look
Image
Image

just for fun I attached a finished neck to this body so you can see the overall look. I didn't catch that there was a ton of dust on the lense until I started editing images
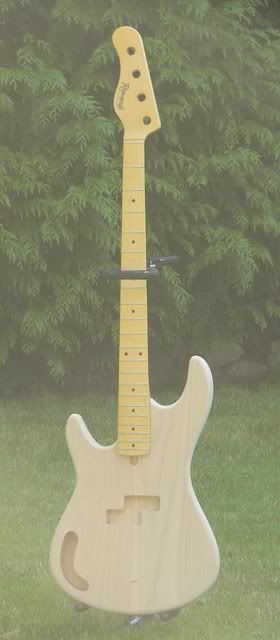
Image


all that remains on this body is to sand, sanding, sanding, sanding, and then a little sanding in prep for painting.

all the best,

R

_________________
Moderator: Blueprinting and Bondo
Pickups: Honey Badger Pickups - Like Honey Badger Pickups on Facebook!
Basses: Regenerate Guitar Works - Like Regenerate Guitar Works on Facebook!


Top
 Profile  
Reply with quote  
 Post subject: Re: new 4-string lefty bass build
PostPosted: August 15th, 2011, 8:51 am 
Offline
User avatar

Joined: December 13th, 2008, 7:03 am
Posts: 807
Location: Montreal, Quebec
Thank you for posting all the work.

can you describe what kind of neck and PU you are going to put on that body?

What is the sound you are going for or caractheristics in the overall finished product?

Thank you

Sly


Top
 Profile  
Reply with quote  
 Post subject: Re: new 4-string lefty bass build
PostPosted: August 15th, 2011, 9:30 am 
Offline
User avatar

Joined: March 10th, 2008, 7:00 pm
Posts: 1184
Location: Seattle, WA USA
sure :)

this will have a Maple/Rosewood neck finished in a similar satin tint as the reference neck in the image above, 12"R fretboard, bone nut, and Ultralight clover keys (might do Lollipop keys for fun)

this will have also have a Nordstrand NP-4 split P pickup with 250K pots and .047uf Orange Drop cap, and a Hipshot vintage bent plate bridge


my target here is to replicate a significant part of my 60's P vibe, but to resolve a couple ergonomics issues that annoy me when I'm doing a studio session or playing an extended set in a hot sweaty club. I accomplished the ergonomics part on a different model, and borrowed a lot of what I did there into this model. the missing part that is new here is the simplicity of a painted body with pickguard, and a key update that I'll share more on when I have this assembled after painting. once I have this all together, I'll record a pair of sound clips with my 60's P and this bass ... that ought to be a good reference for just how close I've been able to replicate the best P I've ever played

with this design I'm also focusing on cost reductions I can achieve by eventually utilizing my new CNC to do all the body work. all the steps shown here are a substantial reduction over what goes into making a fancy wood body, so I've already captured a decent chunk of cost savings. I need to run a few bodies thru the CNC to verify the additional time savings for fabrication before fixing a standard price tag for this design, but I think it will be very attractive to those looking for boutique shop quality on a production priced bass

and to the extent possible I will offer these with a Nitro finished neck and body upgrade option. since I'll be doing the paint work in small batches, there's significant work to be done to get a dusty shop cleaned and dusted so I can do paint work. and for the week I shut it all down to clean up and paint, I won't be working the other tools. obviously I need to work out a production schedule to accommodate this new diversity in the shop

all the best,

R

_________________
Moderator: Blueprinting and Bondo
Pickups: Honey Badger Pickups - Like Honey Badger Pickups on Facebook!
Basses: Regenerate Guitar Works - Like Regenerate Guitar Works on Facebook!


Top
 Profile  
Reply with quote  
 Post subject: Re: new 4-string lefty bass build
PostPosted: August 15th, 2011, 9:59 am 
Offline
User avatar

Joined: December 13th, 2008, 7:03 am
Posts: 807
Location: Montreal, Quebec
Thanks a lot for all these infos. I look forward to hear the final result.

Question: what is the bent plate vintage bridge?


Top
 Profile  
Reply with quote  
 Post subject: Re: new 4-string lefty bass build
PostPosted: August 15th, 2011, 10:05 am 
Offline
User avatar

Joined: March 10th, 2008, 7:00 pm
Posts: 1184
Location: Seattle, WA USA
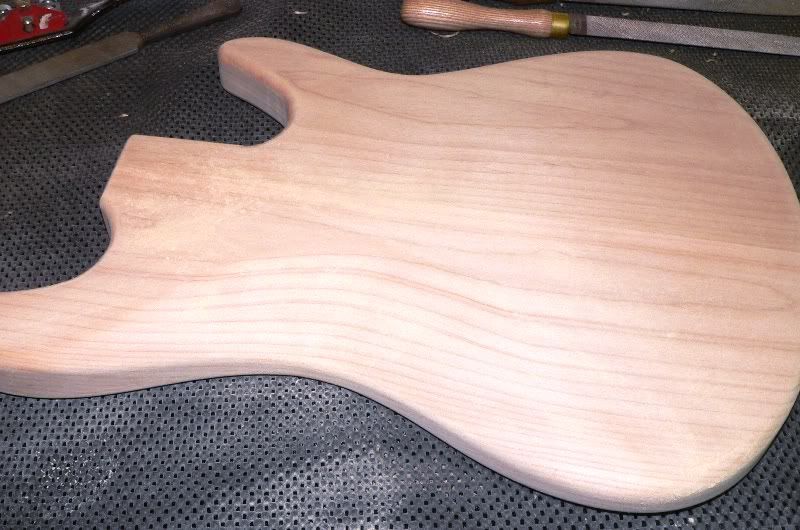
here's an image of the Hipshot vintage bent plate bridge

Image

it's made from brass plate that's a bit heavier than the stock used on vintage basses, and allows for quick string changes without having to run your entire string thru the bridge.

all the best,

R
_________________
Moderator: Blueprinting and Bondo
Pickups: Honey Badger Pickups - Like Honey Badger Pickups on Facebook!
Basses: Regenerate Guitar Works - Like Regenerate Guitar Works on Facebook!


Top
 Profile  
Reply with quote  
 Post subject: Re: new 4-string lefty bass build
PostPosted: August 15th, 2011, 10:25 am 
Offline
User avatar

Joined: December 13th, 2008, 7:03 am
Posts: 807
Location: Montreal, Quebec
Ok great I never saw that bridge before. I did order the chunky one for 5 strings. I notice the rails for the tuning screws to stay in place isn't it?


Top
 Profile  
Reply with quote  
 Post subject: Re: new 4-string lefty bass build
PostPosted: August 15th, 2011, 1:06 pm 
Offline
User avatar

Joined: March 10th, 2008, 7:00 pm
Posts: 1184
Location: Seattle, WA USA
exactly


I'm also toying with this body/neck configuration (but with a Northern Ash body instead of Alder) to utilize a single MM style pickup with a 'replica' inspired 2-band preamp of the original first offered by Leo on that famous 'sea creature named' bass loved by so many. I'll do the same kind of soundclip a/b testing to validate this against my early '77 all stock bass once I have that done

all the best,

R

_________________
Moderator: Blueprinting and Bondo
Pickups: Honey Badger Pickups - Like Honey Badger Pickups on Facebook!
Basses: Regenerate Guitar Works - Like Regenerate Guitar Works on Facebook!


Top
 Profile  
Reply with quote  
 Post subject: Re: new 4-string lefty bass build
PostPosted: August 16th, 2011, 10:32 am 
Offline

Joined: October 27th, 2010, 10:13 pm
Posts: 326
Location: Woodbridge, VA
Rod:

What color are you thinking about painting this thing? It looks great so far.


Top
 Profile  
Reply with quote  
 Post subject: Re: new 4-string lefty bass build
PostPosted: August 16th, 2011, 11:36 am 
Offline
User avatar

Joined: March 10th, 2008, 7:00 pm
Posts: 1184
Location: Seattle, WA USA
I just acquired all of the supplies to finish this body in Vintage Blonde, a color that's a little bit less banana pudding than the typical Vintage White color. I'm debating on whether or not to finish the neck with a matching colored headstock, but it will have a vintage tinted satin finish either way

I'm doing a similar build for myself, and I'll be finishing that body in a faded Fiesta Red color that's more like Coral. I'm pretty certain I'll do a matching colored headstock on this one

all the best,

R

_________________
Moderator: Blueprinting and Bondo
Pickups: Honey Badger Pickups - Like Honey Badger Pickups on Facebook!
Basses: Regenerate Guitar Works - Like Regenerate Guitar Works on Facebook!


Top
 Profile  
Reply with quote  
 Post subject: Re: new 4-string lefty bass build
PostPosted: September 13th, 2011, 5:20 pm 
Offline

Joined: October 27th, 2010, 10:13 pm
Posts: 326
Location: Woodbridge, VA
Matching banana pudding headstock...hmm sounds delicious, and at the same time sounds like it will make an aesthetically pleasing combination, especially as a contrast to the rosewood.

Rodent wrote:
I just acquired all of the supplies to finish this body in Vintage Blonde, a color that's a little bit less banana pudding than the typical Vintage White color. I'm debating on whether or not to finish the neck with a matching colored headstock, but it will have a vintage tinted satin finish either way

I'm doing a similar build for myself, and I'll be finishing that body in a faded Fiesta Red color that's more like Coral. I'm pretty certain I'll do a matching colored headstock on this one

all the best,

R


Top
 Profile  
Reply with quote  
Display posts from previous:  Sort by  
Post new topic Reply to topic  [ 20 posts ] 


Who is online

Users browsing this forum: No registered users and 128 guests


You cannot post new topics in this forum
You cannot reply to topics in this forum
You cannot edit your posts in this forum
You cannot delete your posts in this forum
You cannot post attachments in this forum

Search for:
Jump to:  
Powered by phpBB © 2000, 2002, 2005, 2007 phpBB Group  
Design By Poker Bandits